
Somerville Wood Flooring has handled hardwood floor repair in Somerville, MA for 20+ years, serving surrounding cities including Cambridge, Charlestown, Medford, Everett, Back Bay. Most of the floors we repair are a century old or close to it: narrow red oak strip in the main rooms, pine in kitchens and back halls, and the patches, holes and loose boards that a hundred years of radiators, renovations and leaks leave behind.
A good repair is one you cannot find afterwards. That means matching the species, width and cut of the old wood, weaving new boards into the existing pattern rather than ending them in a straight seam, and fastening them the way the original floor was fastened. A square of new wood with four straight edges is a patch; boards woven in with staggered joints are a floor.
Repair is often the first half of a refinish, but not always. Some repairs can be finished to blend into the existing surface, and some floors only need squeaks or loose boards fixed. We look at the floor, explain what can be repaired on its own and what will need the room sanded, and write it into an itemized estimate.
Board Replacement and Weave-In Repairs
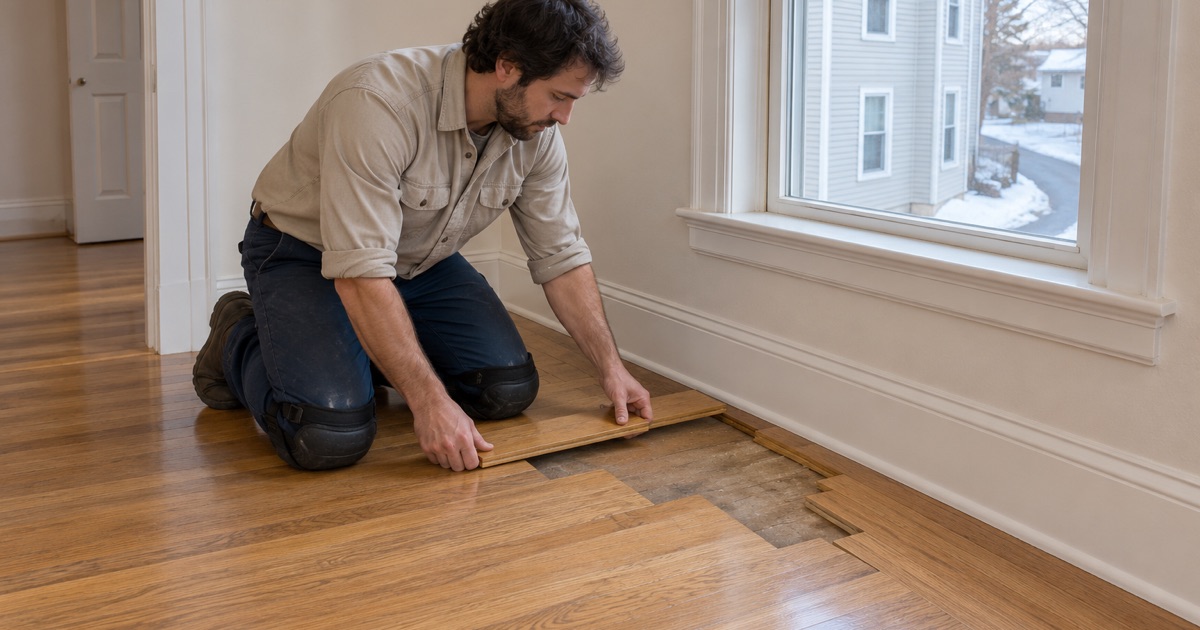
Replacing Damaged Boards
Boards that are split, burned, gouged, stained black or soft from rot have to come out. We cut them out without damaging the tongue and groove of the boards around them, remove the old nails, and fit new boards with the bottom groove lip trimmed where necessary so they drop into place. Each one is glued and face-nailed or blind-nailed the way the floor around it was laid.
We check the subfloor under every opening. If water or pet urine reached it, the stained subfloor is sealed or replaced before the new wood goes down, because an odor or moisture source left underneath will come straight back through the repair.
Weaving New Boards Into Old
A weave-in repair staggers the ends of the new boards so they land at different points, matching the random joint pattern of the original floor. It takes longer than cutting a rectangle, but it is the difference between a repair that disappears once finished and one you see from the doorway for the life of the floor.
Matching Species, Width and Color
Red oak, white oak, maple, eastern white pine, heart pine and Douglas fir all turn up in older houses here, sometimes in the same building. We identify the species and measure width and thickness before sourcing wood. Old boards that have darkened for a century will not match new wood until both are sanded, so we explain how the color will settle after finishing.
Patching Holes and Old Wall Lines
Radiator Hole Patches
When radiators come out during a heating upgrade, they leave pipe holes, cut boards and sometimes a whole rectangle of floor that was never finished under the radiator body. We remove the short pieces around the holes and weave in full-length boards, so the radiator hole patch reads as part of the field rather than a square where a radiator used to stand.
Removed Walls and Moved Doorways
Taking out a wall between two rooms leaves a strip of bare subfloor or a line of cut board ends where the wall plate sat. Sometimes the boards change direction on either side. We lace new boards across the old wall line from both sides, and where the directions differ, we plan a clean transition or a border rather than forcing one pattern into the other.
Floor Vents, Outlets and Old Openings
Floor registers that are no longer used, moved floor outlets, and old pipe chases leave openings that are easy to cover with a plate and hard to repair properly. We fill them with matched boards woven into the surrounding floor, so the room loses the scar rather than gaining a cover.
Fixing Movement, Squeaks and Gaps
Squeaky Floorboards and Loose Boards
Squeaky floorboards come from boards rubbing together or sliding on nails that have loosened from the joist. We locate the joists and fasten loose boards with trim-head screws or new flooring cleats, set below the surface and filled. Where we can reach the floor from a basement below, we shim and fasten from underneath instead.
Nail Pops and Face Nails Working Loose
Old floors were often face-nailed with cut nails, and over decades those nails work up as the boards move. A raised nail catches socks and rips sanding paper. We set every one below the surface, replace the ones that will not hold, and fill the holes to match the wood.
Gaps Between Boards
Seasonal winter gaps that close each summer are normal in a heated house and are best left alone. Gaps that stay open all year, or that widen around a radiator, usually point to movement in the subfloor or a heat source drying one area. We fix the cause where we can and fill permanent gaps with thin strips of matching wood rather than putty that cracks out.
Damage From Water, Pets and Insects
Cupping, Crowning and Buckling
Cupping is board edges rising as moisture gets underneath, crowning is the center left high after a cupped floor was sanded too early, and buckling is boards lifting off the subfloor. We take moisture meter readings, wait for the floor to stabilize, and then decide which boards can stay and which must be replaced.
Pet Urine Stains
Pet urine stains that have turned black go through the board and often into the subfloor. Sanding lightens them but does not remove them. We cut out the stained boards, treat or replace the subfloor beneath, and weave in matching wood so the odor and the stain both go.
Powderpost Beetle, Old House Borer and Carpenter Ants
Exit holes, frass and tunnels in a floor or joist mean wood-boring insects have been at work. We identify the likely insect, replace damaged boards and check the joists beneath. Where there is any sign the activity is current, we recommend a pest professional before repairing, so new wood is not laid over a live problem.
Our Step-by-Step Hardwood Floor Repair Process
Step 1: Inspection and Moisture Readings
We look at the damage, take moisture readings where water is involved, and check the build year and any painted surfaces before we cut anything, because Massachusetts runs its own lead-safe renovation rules for older homes.
Step 2: A Written, Itemized Estimate
The estimate lists each repair separately, the wood we will source, and whether the repair can be blended into the existing finish or needs the room refinished. A landlord can keep it with the unit’s records.
Step 3: Repair and Containment
We seal doors and returns so dust stays in the room, cut out the damaged wood, repair the subfloor if needed and weave in the new boards. In a two-family or three-family, we schedule the loudest saw work around the other households.
Step 4: Finish and Blend
The repair is sanded and finished to blend in, or left ready for a full refinish of the room if that is the plan. We walk through the result with you before we leave.
- 20+ Years With Wood Floors
- Written Itemized Estimates
- Free Estimates